Coffin
This is a step-by-step guide to how I made the coffin, with images of the processes I undertook to create it.
My first point of call for this project was working out the size and scale. I took the original measurements and divided them in half, then marked these on the floor using a tape measure and masking tape.
I then took the original measurements and divided them by 3, then multiplied this by 2 - this gave me 2/3 of the size of the original. I again marked this out on the floor so I could visually see how big this would be.
I decided 2/3 would be better as it needed to be big enough to fit a body within it.

I cut my sheet of celotex into 12 pieces and then cut 45 degree angles into all the corners of these and checked they fitted together nicely to create a box.
I then attached 3 of them together using expandable foam to form one of the faces of the box. I repeated this stage three more times to create four faces of the box.
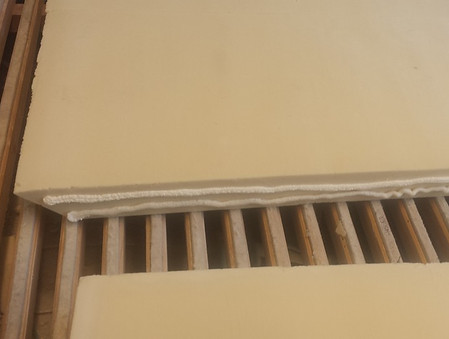
To ensure the expandable foam didn't push the celotex apart I put a weight on one side and wedged it against a sturdy pole on the other. I then put two boards on top to stop it trying to push upwards and out of shape.
These had to be left for a minimum of 20 minutes to dry.

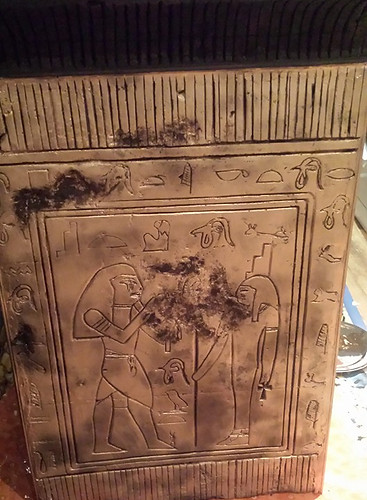
Next I photo copied my designs for engraving into each face of the main body, increased them by 400% and then pieced them together.
I photo copied each design seperately to avoid confusion of mixing up parts of the designs.
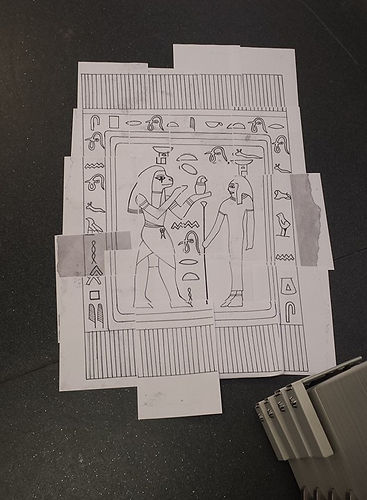
After this I taped them together using cellotape/masking tape and trimmed the corners so it fit on the celotex better.
I repeated this stage for the other two designs as well.

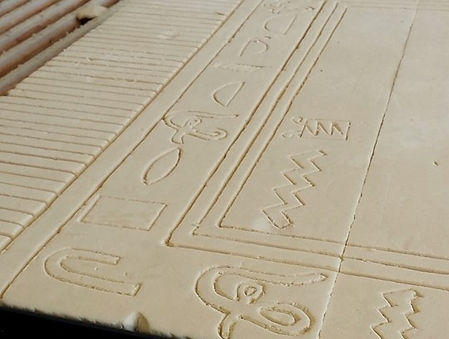
I pinned the design using board pins to temporarily keep it in place, I then proceeded to engrave the design into the celotex using a scalpel. I angled the scalpel at 45 degrees to make a nicer cut than if I were to just cut straight down into the celotex.
This stage was repeated again to have a total of three sides of the main body engraved.

For the straight lines I used a meter ruler to make sure they were straight and accurate.
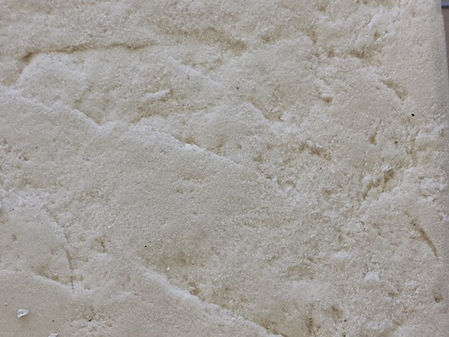
To distress and age the faces I broke a brick in half using a mallet and then pushed the broken side into the celotex to imprint the pattern and texture into it; giving the impression it had eroded.
Next I cut a square out of my left over celotex, then began attaching the faces of the main body to it using expandable foam.

To ensure the faces stayed together I made some small stakes 3cm long from 1cm dowel. I cut the dowel on the band saw and then sanded both ends on a vertical belt sander to make them sharp.
I then proceeded to spray expandable foam down one side and pushed both sides together.

I then put stage weights on each side and one in the corner on the other side of the celotex to push the pieces together and stop the exandable foam disforming and manipulating them.

To apply the final face I decided to turn the main body of the coffin on its side, wedge the stakes in with the expandable foam, put two stage weights on either side to ensure it didn't move and then a board with a brick on, on top of it.

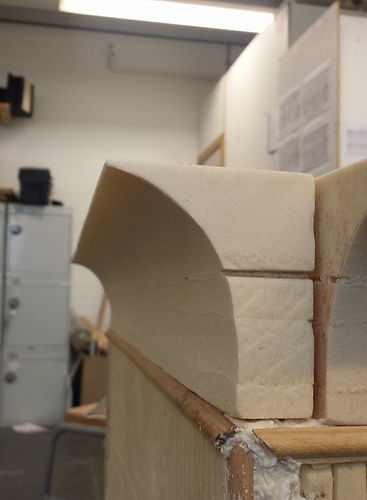
I then moved on to creating the cruves of the main body by attaching the left over pieces of celotex together to make double the thickness. I did this in the same way as before, by applying expandable foam and then putting stage weights on top to force it into place.
After 20 minutes of drying I cut the pieces, using the band saw, into long sections and then cut them again into quarters.
Next I drew the rough shape of the curve that I wanted on one of the sections. I then used the band saw with the small blade (important, as the small blade allow curves o be cut whereas the large bade doesn't) to cut this out.
Once I had this piece cut out I used it as a template to draw more on the other pieces and cut them out too.
I then took four of the new cut pieces and glued them back together using expandable foam, putting a stage weight at either end to force the pieces together.

Once the new long piece hd dried I sanded it using a make shift sander; this was constructed from a cardboard tube with sand paper cellotaped to it. I sanded it until all the four pieces were flush with each other.

I then attached these curves to the main body of the coffin using expandable foam; in places they needed cutting down so I used a snap blade to do this. To fill any gaps I used expandable foam and body filler (1 golf ball size of filler to 1 pea ball size of catalyst).
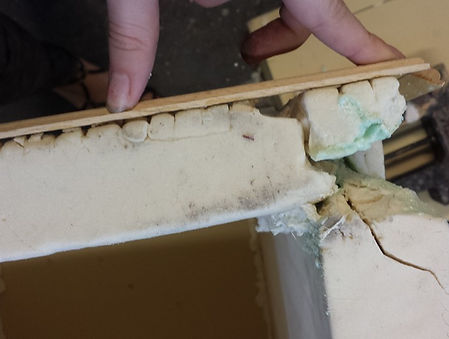
Next I cut the corners by using left over pieces of the curves from the pervious step. I attached a piece on one side so it was too long and hanging off the edge; once dried I cut the piece - using a snap blade - diagonally through the corner.
The other half of the corner I roughly cut a piece that would be long enough for the lip of each side to meet; I then cut across it diagonally again so it roughly fit into the gap. Any gaps and holes that it didn't quite fill I used expandable foam and body filler to fill.

Once the corners were on I cut out the 70cm x 70cm lid out of 18mm MDF and attached this by sprayin the MDF with water using a spray bottle and applied Gorilla glue to the celotex. As this adhesive set it also expanded so I evenly placed stage weights on top to fuse it together tightly.
Next I freehanded the lines to be cut into the curve; the first 9 lines on either side were freehanded and then the rest were marked out with a space of 2cm.

I then moved on to cutting the boarders, to do this I placed the boarder down the right side of the Morso cutter to cut a 45 degree and on it. After one cut I then put one of the boarder to one side - as this was finished - and cut two more down the right side of this machine. I then turn the boarder around and place it down the left side of the cutter and cut the same angle on the opposite side to create a point; I repeat this stage for two boarders. I then cut the final boarder down the left side.
Once the angles are cut I then used the Band Saw to cut the boarder to the correct length.

The corners of the main body were already rather curved but I did cut them using a snap blade and hand sand them a little to help the vertical boarders sit flush.
I attached these using super glue and holding them for a few minutes to apply enough pressure for them to stick.
I then measure between the two vertical boarders on one face and cut three boarders to fit between them; I applied these using the same adhesive and technique.
Body filler and expandable foam were used to fill any gaps joining the boarders and the main body.

Next I applied a base coat of Burnt Umber to the entire piece using a sponge to avoid brush marks.

I then used a thin brush to get into all the crevasse of the piece.
I did a second base coat to avoid it being patchy.

After this I applied Burnt Sienna in a patchy fashion to give the impression of the different colours within the wood.

I then did a base coat using a mixture of Gold Leaf 1100 and 110S in a well ventilated area while wearing a chemical mask, overalls and vinyl gloves.
This was left to dry for 45 minutes before moving it.

I then applied more Burnt Umber into the worn away/aged parts of the piece and some Van Dyck crystals mixed with water to make it look slightly dirty.